- 浏览: 13631094 次
- 性别:

- 来自: 洛杉矶
-

文章分类
- 全部博客 (1994)
- Php / Pear / Mysql / Node.js (378)
- Javascript /Jquery / Bootstrap / Web (435)
- Phone / IOS / Objective-C / Swift (137)
- Ubuntu / Mac / Github / Aptana / Nginx / Shell / Linux (335)
- Perl / Koha / Ruby / Markdown (8)
- Java / Jsp (12)
- Python 2 / Wxpython (25)
- Codeigniter / CakePHP (32)
- Div / Css / XML / HTML5 (179)
- WP / Joomla! / Magento / Shopify / Drupal / Moodle / Zimbra (275)
- Apache / VPN / Software (31)
- AS3.0/2.0 / Flex / Flash (45)
- Smarty (6)
- SEO (24)
- Google / Facebook / Pinterest / SNS (80)
- Tools (22)
最新评论
-
1455975567:
xuezhongyu01 写道wocan23 写道我想问下那个 ...
Mysql: LBS实现查找附近的人 (两经纬度之间的距离) -
xuezhongyu01:
wocan23 写道我想问下那个111.1是怎么得来的我也看不 ...
Mysql: LBS实现查找附近的人 (两经纬度之间的距离) -
18335864773:
试试 pageoffice 在线打开 PDF 文件吧. pag ...
jquery在线预览PDF文件,打开PDF文件 -
青春依旧:
opacity: 0.5; 个人喜欢这种方式!关于其他css特 ...
css透明度的设置 (兼容所有浏览器) -
July01:
推荐用StratoIO打印控件,浏览器和系统的兼容性都很好,而 ...
搞定网页打印自动分页问题
Raphael JS is a lightweight and super-sexy JavaScript framework that allows you to draw vector graphics in your browser! In this tutorial, I will introduce you to some basic drawing functionality, take a look at animation, provide DOM access and finally finish off by creating a cool widget for your site…
Tutorial Details
- Framework : Raphael JS
- Version : 1.0
- Difficulty: Beginner to Intermediate
- Estimated Completion Time: 30 minutes
1. Getting Set Up
Let’s get started by downloading the Raphael JS framework from here
. At the top right of the page, you’ll see
compressed and uncompressed copies of Raphael version 1.0. I’d
recommend you grab yourself a copy of the uncompressed source for the
time being – this way you can have a peek at the source and see what extra edge you can get on the documentation.
With that downloaded, let’s set up a simple HTML document called index.htm and include Raphael in it. We also include our_script.js , which is where we’ll write our own JavaScript, and in the body of the document we create a minimally styled div with ID canvas_container , which will act as a container for our drawings.
<html>
    <head>
        <title>Raphael Play</title>
        <script type="text/javascript" src="path/to/raphael.js"></script>
        <script type="text/javascript" src="path/to/our_script.js"></script>
        <style type="text/css">
            #canvas_container {
                width: 500px;
                border: 1px solid #aaa;
            }
        </style>
    </head>
    <body>
        <div id="canvas_container"></div>
    </body>
</html>
N.B. The first stable release of version 1.0 was only made available on the 7th October 2009, so it’s pretty new. It makes one very important change to the way you draw paths, so if you’re using an earlier version of Raphael, make sure you upgrade and check out the documentation on effecting backwards compatibility.
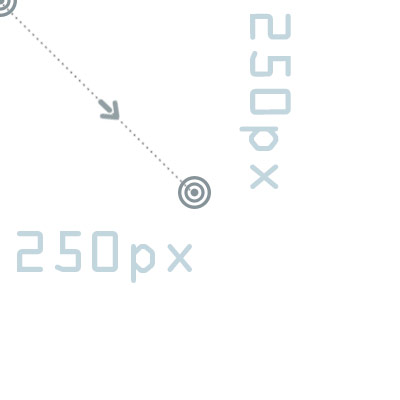
2. Creating our Drawing Canvas
When we draw with Raphael, we do so onto a canvas . This canvas, which we’ll reference in a variable called ‘paper’, is created using the Raphael() object. We always specify the width and height of the canvas, but have the option of also specifying either a) the absolute position of the canvas relative to the viewport, or b) an element ‘container’ that the canvas is drawn inside.
var paper = new Raphael(x, y, width, height); //option (a)
var paper = new Raphael(element, width, height); //option (b)
I generally prefer the latter method (b), since we usually know where our divs are. In our_script.js , let’s wait for the DOM to load and then create a 500px by 500px canvas inside our canvas_container div:
window.onload = function() {
    var paper = new Raphael(document.getElementById('canvas_container'), 500, 500);
}
All our drawing methods will now be bound to the paper variable.
3. Built-in Shapes
Now that we have our canvas, let’s draw some shapes onto it. The origin , that is, the x = 0, y = 0 point, is at the top-left corner of our canvas. This means that any x, y coordinates we specify in our methods are relative to this point.
First off, a circle . Modify our_script.js to look like this:
window.onload = function() {
    var paper = new Raphael(document.getElementById('canvas_container'), 500, 500);
    var circle = paper.circle(100, 100, 80);
}
This will draw a circle with a radius of 80px with its center placed at x = 100, y = 100. We can draw as many circles as we like and we don’t have to reference them in a variable:
for(var i = 0; i < 5; i+=1) {
    var multiplier = i*5;
    paper.circle(250 + (2*multiplier), 100 + multiplier, 50 - multiplier);
}
Next, let's draw a rectangle . We do this using the rect() method, which takes as parameters: the x and y coordinates of the rectangle's top-left corner and the rectangle's desired width and height.
var rectangle = paper.rect(200, 200, 250, 100);
Finally, we'll draw an ellipse . Its parameters are the same as the circle, i.e. x, y, radius, except that we can specify x and y radii specifically.
var ellipse = paper.ellipse(200, 400, 100, 50);
This will draw an ellipse with x-radius = 100, y-radius = 50 at x = 200, y = 400. Our our_script.js file should now look like this:
window.onload = function() {
    var paper = new Raphael(document.getElementById('canvas_container'), 500, 500);
    var circle = paper.circle(100, 100, 80);
    for(var i = 0; i < 5; i+=1) {
        var multiplier = i*5;
        paper.circle(250 + (2*multiplier), 100 + multiplier, 50 - multiplier)
    }
    var rectangle = paper.rect(200, 200, 250, 100);
    var ellipse = paper.ellipse(200, 400, 100, 50);
}
If we now open up index.htm in our browser, we should get a bunch of shape drawings:
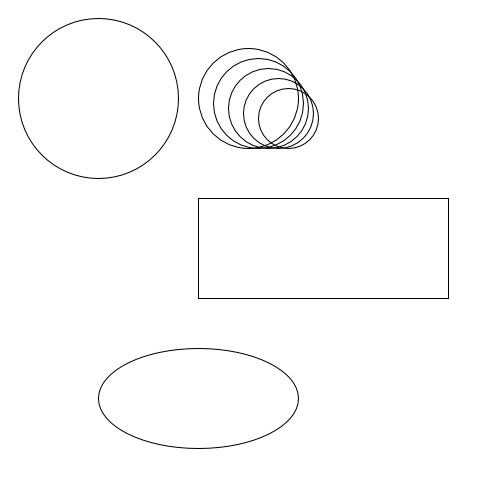
Example Here
4. Drawing Paths
While the built-in shapes are handy to have, it is paths that offer us true drawing flexibility.
When drawing paths, it helps to think of an imaginary cursor
or pen-point pressed against the screen. When we create our canvas, the
cursor is rooted to the top-left corner. The first thing we should do, then, is
lift up our cursor or pen-point and move it to a spacious region in which we can draw.
As an example, let's move our cursor to the centre of our canvas. That is, let's move it 250px in the x-direction and move it 250px in the y-direction.
We do this using a so-called path string .
A path string is a string comprised of 'action' commands and numeric values corresponding to the command. We move our cursor to x = 250, y = 250 using the following string:
"M 250 250"
'M' means we want to move without drawing and is followed by x and y canvas co-ordinates.
Now that our cursor is where we want it, let's draw a line relative to this point using the lower-case 'L' command, 'l'.
"M 250 250 l 0 -50"
This will draw a line upwards 50px in the y-direction. Let's write a path string that will draw a tetris tetronimo:
"M 250 250 l 0 -50 l -50 0 l 0 -50 l -50 0 l 0 50 l -50 0 l 0 50 z"
The 'z' command signifies the path closing - it will join a line from wherever we are to the point specified by our initial 'M' command.
We tell Raphael to actually draw this path using the path() method. Modify our_script.js to look like this:
window.onload = function() {
    var paper = new Raphael(document.getElementById('canvas_container'), 500, 500);
    var tetronimo = paper.path("M 250 250 l 0 -50 l -50 0 l 0 -50 l -50 0 l 0 50 l -50 0 l 0 50 z");
}
If you load up index.htm , you should now see a tetronimo like this:

Path strings can become incredibly (brilliantly) complex using curve and arc commands. Full coverage of paths can be found at the
SVG Path specification
page.
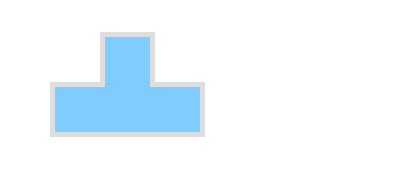
5. Attribute Styling
Our tetris tetronimo, whilst wonderful, is not very aesthetically pleasing. We'll fix that using the attr() method.
The attr() method takes an object consisting of various property-value pairs as its parameter. Since we stored a reference to our tetronimo in the variable tetronimo , we can take this variable and add the attr() method to it. We could equally well chain the attr() method to the path() method, but let's keep things sane for the time being. I'll demonstrate the use of attr() by example:
window.onload = function() {
var paper = new Raphael(document.getElementById('canvas_container'), 500, 500);
var tetronimo = paper.path("M 250 250 l 0 -50 l -50 0 l 0 -50 l -50 0 l 0 50 l -50 0 l 0 50 z");
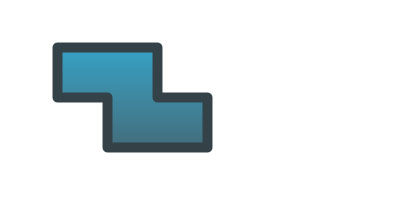
tetronimo.attr({fill: '#9cf', stroke: '#ddd', 'stroke-width': 5});
}
produces this:
window.onload = function() {
    var paper = new Raphael(document.getElementById('canvas_container'), 500, 500);
    var tetronimo = paper.path("M 250 250 l 0 -50 l -50 0 l 0 -50 l -50 0 l 0 50 l -50 0 l 0 50 z");

    tetronimo.attr(
        {
            gradient: '90-#526c7a-#64a0c1',
            stroke: '#3b4449',
            'stroke-width': 10,
            'stroke-linejoin': 'round',
            rotation: -90
        }
    );
}
produces this:

The Raphael documentation
is pretty extensive when it comes to the attr() method.
Have a play around with the various object property-value combinations.
6. Animation
The animate() method in Raphael is really, really good. It allows us to animate our drawings in a jQuery-esque manner, animating the attributes we supply it over some period of time with an optional easing.
Let's rotate our most recent tetronimo by 360 degrees. The rotation attribute is absolute, so this should take it one full rotation and bring it back to its un-rotated state.
window.onload = function() {
    var paper = new Raphael(document.getElementById('canvas_container'), 500, 500);
    var tetronimo = paper.path("M 250 250 l 0 -50 l -50 0 l 0 -50 l -50 0 l 0 50 l -50 0 l 0 50 z");
    tetronimo.attr(
        {
            gradient: '90-#526c7a-#64a0c1',
            stroke: '#3b4449',
            'stroke-width': 10,
            'stroke-linejoin': 'round',
            rotation: -90
        }
    );

    tetronimo.animate({rotation: 360}, 2000, 'bounce');
}
The animation takes place over 2 seconds (2000 milliseconds) and is told to ease into its final state with a 'bounce'.
Example here .
We can also supply a callback function as an argument. This callback function is invoked after the animation finishes. The following example will animate the tetronimo's rotation and stroke-width and then reset itself with another animation in the callback function.
tetronimo.animate({rotation: 360, 'stroke-width': 1}, 2000, 'bounce', function() {
    /* callback after original animation finishes */
    this.animate({
        rotation: -90,
        stroke: '#3b4449',
        'stroke-width': 10
    }, 1000);
});
The this keyword references the original tetronimo from within the callback function.
Example here .
Animating Paths
Being a bit of a code geek, I rarely ever got past drawing simple shapes in Flash. But one thing I liked playing with was shape tweening . Well, Raphael goes some way to emulating shape tweening by specifying a path string in the animate() method. Another tetronimo, the Z tetronimo in Tetris, has the following path string,
"M 250 250 l 0 -50 l -50 0 l 0 -50 l -100 0 l 0 50 l 50 0 l 0 50 z"
and it looks like this:
Now, using our original tetronimo with minimal attribute styling, i'm going to specify the new path string in our animate() method.
tetronimo.attr(
    {
        stroke: 'none',
        fill: 'blue'
    }
);

tetronimo.animate({
    path: "M 250 250 l 0 -50 l -50 0 l 0 -50 l -100 0 l 0 50 l 50 0 l 0 50 z"
}, 5000, 'elastic');
You should see our original tetronimo morph into our new one. The effect is made all the more pronounced by specifying 'elastic' as the easing type.
Example here .
7. Dom Accessibility
If we want to get access to our elements as DOM elements, we can do so with some ease. This is thanks to the node property. Using this, we can add event handlers to our drawings, which i'll proceed to show you.
Let's start by drawing a circle in our our_script.js file.
window.onload = function() {
        var paper = new Raphael(document.getElementById('canvas_container'), 500, 500);

        var circ = paper.circle(250, 250, 40);
        circ.attr({fill: '#000', stroke: 'none'});
}
Now, let's add the text, 'Bye Bye Circle!' so that its center point is at the same point as our circle center.
var text = paper.text(250, 250, 'Bye Bye Circle!')
text.attr({opacity: 0, 'font-size': 12}).toBack();
I have set the opacity to 0 so that it is initially hidden. Notice the chaining of the toBack() method. This places the text behind all other canvas drawing elements (similarly, toFront() brings elements to the very front of our canvas). Now, let's add a mouseover event handler to our circle using the node property. We will set the cursor style to 'pointer'.
circ.node.onmouseover = function() {
    this.style.cursor = 'pointer';
}
What this actually does is set the style property of the <circle> object in our document. Our document looks like this:
<circle cx="250.5" cy="250.5" r="40" fill="#000000" stroke="none" style="fill: #000000; stroke: none; cursor: pointer">
</circle>
Now, let's finally add an onclick event handler to our circle:
circ.node.onclick = function() {
    text.animate({opacity: 1}, 2000);
    circ.animate({opacity: 0}, 2000, function() {
        this.remove();
    });
}
When the circle is clicked, the text we referenced in the variable text is animated to full opacity over 2 seconds. The circle itself is animated to 0 opacity over the same time period. We also include a callback function in the circle's animate method. This removes the the circle element from our document once the animation has finished, since whilst the circle has 0 opacity, it is still clickable until removed.
Example here .
8. Let's Build a Widget
Finally, let's pull together what we've learned and build a pretty little Mood Meter. Basically, you will select a mood value between 1 and 5, 1 being 'rubbish' and 5 being 'positvely manic', and Raphael will create a nice representation of this.
View the widget here

Begin by modifying our_script.js to look like this:
window.onload = function() {
    var paper = new Raphael(document.getElementById('canvas_container'), 500, 500);
    var circ = paper.circle(250, 250, 20).attr({fill: '#000'});
    var mood_text = paper.text(250, 250, 'My\nMood').attr({fill: '#fff'});
}
This creates a circle of radius 20px at the center of our canvas and some text on top of the circle saying 'My Mood'. 'Mood' is placed on a new line using '\n'.
Next, let's create some custom information corresponding to our moods and choose which mood we're in.
moods = ['Rubbish', 'Not Good', 'OK', 'Smily', 'Positively Manic'];
colors = ['#cc0000', '#a97e22', '#9f9136', '#7c9a2d', '#3a9a2d'];

//pick a mood between 1 and 5, 1 being rubbish and 5 being positively manic
var my_mood = 1;
The text description of our mood is stored in an array called 'moods' and the color corresponding to this mood is stored in an array called 'colors'. The chosen mood, a value between 1 and 5, is stored in the variable my_mood.
Now let's create a function called show_mood. When invoked, this function will display our mood circles (the colored circles) and the text corresponding to this mood.
function show_mood() {

    for(var i = 0; i < my_mood; i+=1) {
        (function(i) {
            setTimeout(function() {
                paper.circle(250, 250, 20).attr({
                    stroke: 'none',
                    fill: colors[my_mood - 1]
                }).animate({translation: '0 ' + (-42 * (i+1))}, 2000, 'bounce').toBack();
            }, 50*i);
        })(i);
    }
    paper.text(250, 300, moods[my_mood - 1]).attr({fill: colors[my_mood - 1]});

    mood_text.node.onclick = function() {
        return false;
    }
    circ.node.onclick = function() {
        return false;
    }

}
In show_mood(), we have a loop that iterates as many times as the value of my_mood. Inside this loop is a self-executing anonymous function. This is necessary so that we have access to the variable i at each stage of the iteration. Inside the self-executing function, we create a timeout - every 50*i seconds, a circle is created at the point of our original circle. Each circle is then translated over 2 seconds to 0px in x and some multiple of -42px in y. We make sure to place each successive circle at the back of the canvas. Note that the circles are filled according to the color in the colors array, determined by my_mood.
show_mood() is also responsible for the display of our mood text which uses my_mood to pick the corresponding mood from the moods_array.
show_mood() then finally get rid of any onclick event handlers assigned to the original text and circle we placed at the center of the canvas. This prevents the re-drawing of moods circles.
Finally, let's assign onclick event handlers to the center circle and 'My Mood' text. I assign event handlers to both elements so that clicking on either the text or circle has the effect of calling show_mood().
circ.node.onclick = show_mood;
mood_text.node.onclick = show_mood;
Conclusion
Well, that's it! You should now have a sound platform on which to
base your explorations into the Raphael JS framework. Most importantly, I
hope
you're now eager to delve into Raphael JS and concoct some
beautiful browser drawings and widgets. Don't forget to follow me on Twitter
, and share your creations.
- Follow us on Twitter , or subscribe to the Nettuts+ RSS Feed for more daily web development tuts and articles.
来源:http://net.tutsplus.com/tutorials/javascript-ajax/an-introduction-to-the-raphael-js-library/
- Raphael_examples.zip (28.2 KB)
- 下载次数: 20


发表评论

-
使用jQuery和Pure.CSS创建一个可编辑的表格
2016-08-26 02:24 1174使用开源组件真的可以 ... -
2016十大优秀jQuery插件推荐
2016-08-26 02:24 2257当有限的开发知识限制了设计进展,你无法为自己插上创新的翅膀时 ... -
jQuery .tmpl() 用法
2016-08-26 02:22 1172参考效果: DEMO 下载: jquery-tmpl-ma ... -
jQuery:从零开始,DIY一个jQuery(2)
2016-08-19 03:06 1008在上篇文章我们简单实 ... -
jQuery:从零开始,DIY一个jQuery(1)
2016-08-19 03:00 939从本篇开始会陪大家一起从零开始走一遍 jQuery 的奇妙旅 ... -
Bootstrap 3: 菜单居中 Center content in responsive bootstrap navbar
2016-08-18 06:15 1545先看上面图片的效果,下面是代码: .navbar .nav ... -
jQuery: 操作select option方法集合
2016-08-18 06:06 3293每一次操作select的时候,总是要谷歌一下资料,真是太不爽 ... -
jQuery: 插件开发模式详解 $.extend(), $.fn, $.widget()
2016-08-16 05:31 1197原文:http://www.codeceo.com/arti ... -
jQuery: 选择器(DOM,name,属性,元素)
2016-08-11 01:17 4454出处:http://www.cnblogs.com/star ... -
jQuery: 合并表格中相同文本的相邻单元格
2016-08-01 08:02 1336一、效果 二、代码 <!DOCTYPE ... -
Bootstrap 3: 使用注意box-sizing细节及解决方法
2016-08-01 07:58 1556一、bootstrap样式 在Bootstrap v3.3 ... -
域名详解
2016-07-29 12:51 820域名 域名就是用来唯� ... -
Bootstrap 3: 图标转换事件 Change icons when toggle
2016-07-20 13:39 2269代码: <link href="http: ... -
Bootstrap 3: 图标转换事件 Change icons when toggle
2016-07-19 07:12 713代码: <link href=" ... -
jQuery:无限循环两个或者多个事件 click / toggle between two functions
2016-07-19 07:12 1589插件: (function($) { $.fn. ... -
javascript 中面向对象实现 如何继承
2016-07-14 01:01 504上一篇博客已经说了关于javascript中的封装, 其中也 ... -
javascript 中的面向对象实现 如何封装
2016-07-12 12:27 1178javascript 是一门很灵活的语言,也是一门有缺陷的语 ... -
AngularJS jQuery 共存法则
2016-06-14 05:26 3568寻找正确的方法,如何在AngularJS里使用jQuery ... -
七步从Angular.JS菜鸟到专家(3):数据绑定和AJAX
2016-06-04 05:28 1100AngularJS学习列表:七步 ... -
七步从Angular.JS菜鸟到专家(2):Scopes
2016-06-04 05:27 686AngularJS学习列表:七步走 Angular.js 从 ...
相关推荐
可视化流程设计器,基于jQuery和Raphaël ,兼容性强,使用方便,扩展性强。经过一夜的努力反编译了一位大神的代码,整理了整体思路并添加注释。 具体描述可在我博客中找到。 10分确实有点贵,但是绝对超值,而且我...
Raphaël is a small JavaScript library that should simplify your work with vector graphics on the web. If you want to create your own specific chart or image crop and rotate widget, for example, you ...
NULL 博文链接:https://justcoding.iteye.com/blog/665253
raphael.boolean.js-使用Raphaël执行布尔运算 该插件为javascript矢量库Raphaël( )提供了布尔操作。 您可以使用单个元素(而不是集合)来执行 联合[A + B | A或B] 差异[A-B | A NOT B] 交集[A * B | A和B] ...
本人网上找的代码,进过修改增加了省区文字 演示地址:http://www.5imvc.com/Rep/Map
Raphaël 是一个小型 JavaScript 库,它可以简化您在网络上使用矢量图形的工作。 例如,如果您想创建自己的特定图表或图像裁剪和旋转小部件,您可以使用此库轻松轻松地实现它。 Raphaël ['ræfeɪəl] 使用 SVG W3C...
NULL 博文链接:https://love-66521.iteye.com/blog/1974593
Raphaël Hertzog and Roland Mas had the required qualities and managed to create and update this book. I thank them very much for their work and have no doubt that reading this book will be both ...
RaphaëlVarane新标签页扩展程序为您的Chrome浏览器带来了新外观。 安装RaphaëlVarane New Tab Theme,并欣赏RaphaëlVarane的精选高清图片。 它带有一些很酷的属性,这些属性可以改善您的“新标签页”体验,例如:...
它基于Raphaël库进行矢量绘图。 入门 安装Justgage就像... bower install justgage-official 或您想使用NPM ... npm install justgage --save 示例 或者您可以随时下载CSS和JS文件... <!-- Raphael must ...
Raphaël.js 是一个小型的 JavaScript 库,用来简化在页面上显示向量图的工作。你可以用它在页面上绘制各种图表、并进行图片的剪切、旋转等操作。 Raphaël.js 使用SVG W3C推荐标准和VML作为创建图形的基础。
使用Raphael的静态svg生成 安装 npm install node-raphael 动机 NIH-不是在这里发明的...不好意思..我想在不使用客户端的情况下生成一些美观的图表(因为这对于非交互式图像来说是la脚的) 用法 var raphael = ...
包括 jQuery、Raphael 和 xdot.js。 使用xdot格式的文本创建一个新的 XDotParser 对象,解析它,然后绘制它。 var graph = new XDotParser ( text ) . parse ( ) ; graph . draw ( ) ; 或者,您可以通过 AJAX ...
本资源只是个简单的教程,如有疑问欢迎留言探讨
Raphaël JavaScript 库转换器准备好。 放。 拉斐尔。 将内容从 SVG 文件转换为 Raphaël JavaScript 代码。在线转换工具请访问为您的项目使用我们的自动转换器。用法 <?phptry { $xml = file_get_contents(...
曲线图 动感 ... 该项目的目的是通过绘制椭圆曲线组成的点来帮助更好地理解这项技术。 此外,添加点的过程是可视化的。... 所使用的技术栈由 HTML、JavaScript、CSS 和。 路线图 实现 k 乘法 在状态栏中显示计算
Raphaël:跨浏览器矢量图形的简便方法访问图书馆网站以获取更多信息: 快速入门指南您需要安装NPM才能构建库。 git clone ...
#RaphaëlLustin的个人页面